Thanks for being a follower! It means alot and I love comments!

 This is a picture of my dad, aunt and 2 uncles. The background (white) I sprayed with glimmer mist. The pink background was cut using my cricut. I used the MS butterfly punch. I also hot glued large diamonds on the rikrak ribbon. Diamonds came from the wedding section in Hobby Lobby.
 This LO was inspired by Darien over at SB.com. Click her name to be taken to her blog. I used a script stamp and stamped the background. Then I used Gesso and painted over the script to dull down the brightness of it. I inked around each of the cream squares. I also used the same technique with the word "story" as I did on my "Grands" page, using the UTEE and the Martha Stewart Micropearls. I alcohol inked the beaded ribbon and the mat for the picture is a page out of an old book my mother had laying around her house.

 It's not very often that grandma has all her children together in the same place. So this picture is going to be very meaningful to her. I used the half shell punch by Martha Stewart and using a 2 3/4 inch paper I cute it all the way around to give it the illusion that it's a full circle. Then I weaved tulle in the middle and finished it with pearls that I hot glued on.
 We went bowling while we were in NY visiting. First time I ever bowled with my grandma. It was awesome. My 3 year old and his great grandma bowling together was priceless. She is 92 and still bowls twice a week.
 My dad and my 2 uncles. I used the Martha stewart butterfly punch and then glittered just the end of the wings. Letters are thickers. I handmade the flower. It's from a tutorial that I put on here not long ago.

 This LO gave me such a hard time. It has sat on my craft desk the entire month of June. Unfinished. This is another one of those LO's that I had to say to myself that I didn't care how it turned out just so I could finish it. This is Palette #9 from The Color Room. Does that tell you how long it sat there? LOL The pink scalloped paper I cut using my cricut. I glimmer misted the white cardstock. I used a doily (long rectangle) and cut it in half then glimmer misted it. The smaller flowers were white and I glimmered those and put a little pearl in the center after I colored them with alcohol ink.
  I made these larger flowers myself. I will post a tutorial of them soon. I stickled them to give them more shine.
 I was going to add some journaling to this LO because I wanted to remember the story behind this picture but ran out of room. Probably write the journaling on the back. But while we were at the beach, Christian, my oldest was sitting behind Grace out of the camera view. I had my camera trained on Grace trying to get a good shot. Christian said or did something to make Grace whip her head around to look at him and when she did, gave this smile to him. Then just as fast, whipped her head back around and kept on playing. I'm so glad I had my camera ready and waiting b/c I indeed did get the perfect shot!!! I played with it in an editing program to give it the softer look.
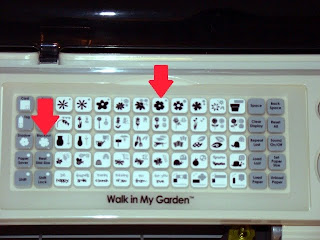
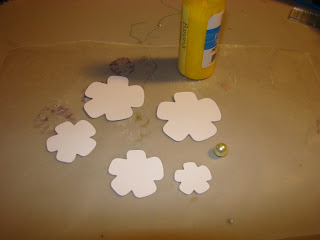 Spray both sides


 Hot glue the small flower with pearl to the next size up and crumble those petals around the middle as shown.
 Do the same with the largest size. This is what you should now have:
 Carefully open the blossom back up and adjust the flower until you like the shape of it.
 This is my finished product!! I made several in different colors as you see!!! You'll be seeing these on a LO soon.
 I hope this tutorial was easy to understand and the pictures helped show what I was explaining. This is my first time doing a tutorial so any help/suggestions are appreciated! Sorry the picture quality is so bad. I had to do this indoors after the kids went to bed so my lighting was horrible. Thanks for looking!!!!!!


